Saturday, January 28, 2012

Playing Catch-up

I forget to write my blog while the kids are at school; I'm busy with work, and the house, and facebook, and pinterest....

Anywhoo, the kids get home, they take over the Mac. For hours. And while I can write my blog on my laptop, I use our family Mac for uploading photos. So I use their computer-hogging as the excuse for not updating my blog.

But that doesn't stop me from creating. I was keeping Wednesday's creation in my back pocket, an easy project when I needed a quickie. When my oldest was in grade school, she and I would make little crafts as her Valentine's Day gifts to her classmates. There's so much candy given out, I convinced her that a non-edible object would be unique and memorable. One year, we made Shrinky Dink heart keyrings; another year, we made ribbon bookmarks. And they were popular, her classmates really liked having something they could keep and use.

bookmark fixings

end rings attached to the ribbons
I like the bookmark project particularly; just about everybody I know could use multiple bookmarks, and these are hard to lose. I cut a length of ribbon, used jewelry pliers to attach end rings to each cut end. Beads or charms can be attached to the end rings with jump rings.

fancy reading accessory
I made two bookmarks; good thing, because my youngest took the brocade ribbon bookmark for herself the next day! I used long beads on the blue ribbon, putting a head pin through each bead, bending the end of the pin into a loop, then using a jump ring to attach the pins to the end rings.


I continued the wire work on Thursday - I made tiny hangers and itty bitty fabric dress silhouettes, then attached the dresses to the hangers with little red clothes pins that I bought in December. See, this was a project I saw displayed in a fabric store - with a pattern and everything! All I could think was, "Really, somebody needs a pattern to make this?!?"
What's wrong with wire hangers?


I made up the hanger shape, cut out a dress shape, and pinned it all together. No pattern necessary. This would be a fun Christmas ornament; or make a set of dresses in coordinating fabrics, put a string across a window, and make a whimsical valance.

so cute!

Wednesday, January 25, 2012

It's a three-fer kind of blog

I'm coasting, to the point of floundering, right now. Theater and family are overwhelming me right now; my husband is connected to both, which isn't helping my mood or my creative mojo.

Our conversations the last couple of days have been full of manipulations, demands, anger, and - the possibility of a split. We've reached a wary agreement for the short term; it's not ideal, but should get us through my crazy February schedule. I hope.

This is part of the reason I haven't posted for a few days; too much emotional drama and bad energy. But goals must still be met, so I put on my big-girl panties and got back to it.

My oldest had a sewing project she needed some help with, so we spent Sunday afternoon working on a cybermat creature. She got the pattern from somebody on tumblr. This was sandwiched between some serious discussions between the hubs and me; I wasn't in the mood to work on anything of my own. It made for a nice break.
I don't know what it is, either

So, after all the drama on Sunday, all I could manage was a pair of earrings. They were so pretty, I made a second pair on Monday.

ooh, sparkly!

a disk, a post, a jump ring, and some crystals
 
Finally, on Tuesday evening, I worked on a t-shirt design for "Slasher".  It's an iron-on decal, so I had to get the size and rotation ready to print onto transfer paper. It needs to be a mirror image on the transfer paper, to read correctly once it's on the t-shirt.

otherwise known as "Busters"

Peace out.

Sunday, January 22, 2012

101 Uses for Old Christmas Cards, Give or Take

Christmas is long behind us now; the decorations are put away (and if they're not, I'm not judging); gifts have been tested, tried out, put to use; which just leaves - the Christmas cards.


Beautiful miniature pieces of art that are sent to friends far and near, mostly to say, "Hey, I made it another year." (nice rhyme!) Some arrive with the overlong, "look what I did" Christmas Letter, that boast-filled epistle we all openly mock, even as we secretly wish our own humdrum lives were slightly more exciting. Though I did read two very funny, finding-the-humor-in-the-absurdities-of-life, letters from theater friends this past holiday season. Those letters are always a joy to receive.

kids+snow=Christmas!
So, what do you do with old Christmas cards? They're wonderful inspirations for a variety of projects, as I was reminded last night by my friend LSA. Her facebook status about art projects created a lengthy commentary on Christmas card uses, which inspired my Saturday creation.

Many years ago, my Aunt Jeri taught me how to make a small box out of a Christmas card; it involves several folds and a few cuts, with the final object looking for all the world like a tiny wrapped present!
pretty packages
I asked LSA, via facebook, if she did anything like this with her old cards; she wasn't aware of this particular use, and asked me for a pattern. Now, I haven't made one of these boxes for a few years, and had to work out the process all over again. But, muscle memory is a wonderful thing - it only took one botched attempt to get all the folds into the right shape.
oops
And now - I do have a pattern! This is my first attempt at a tutorial blog; I'm really a hands-on type of instructor, showing the process as I explain the steps. I took photos of every step, so I'm hoping a combination of written instructions and visual cues will make this an easy-to-follow project.

grid paper to the rescue!
Christmas cards come in a variety of sizes, but almost all of them are rectangular. You may notice that my pattern is square; you'd be correct. I made a 5"x 5" square, but you can adjust the size to fit the pictures on the front of the cards. Just remember, it's hip to be square.

The first step is to cut the front of the card into a square (just like the first photo, the wreath card); the lightly sketched lines on the pattern are the fold lines, the dotted lines are the cut lines, and there is a dot marking the center of the square. These markings would be on the wrong side of the card; you don't need to draw all of these lines on your card; I put them on the grid paper as a guide. You do need to mark the center point of the square on the wrong side.

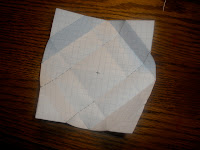
Step 2: Fold the four corners to the center point of the card, so that all four corners meet. The card should be face-down. Smooth the folds with your fingers or a bone folder.
where corners meet
Step 3: Fold two opposite sides toward the center, so that the fold edges meet. Smooth the fold edges. Open these folds up, turn the card 90 degrees, and repeat with the other two opposite sides. Again, smooth the fold edges. Open these folds back up, as well. There should be four intersecting fold lines halfway between the center and each first fold edge.

more folds
Step 4: Open all of the folds, so that you're back to the original square size. Cut along four of the folds, as marked on the pattern by dotted lines. Be very careful not to cut too deep! Note: If you've made origami boxes out of thin paper, you don't need to cut the paper, but card stock is much thicker and needs to be cut for the next step. The four cuts should be on opposite corners; this creates tabs that the corners will fold over.
cuts made oh-so-carefully

we're almost done!


Step 5: Fold the uncut corners back into the center, then bring long edges up at a 90 degree angle, to create two of the sides. Fold the cut tabs in as if to form the other two sides, overlapping two tabs on each side; then fold the two remaining corners over the tabs, matching all four corners in the center once again. And you should have a square, open box!

step 5, part 2...
step 5, part 1...


step 5, part 3!

Step 6: because the cardstock is heavy and stiff, you'll want to put a small piece of Scotch tape on the inside, holding the four corners in place.

it really is invisible tape!

 To make a bottom half for your box: use the other side of the card, and cut the starting square about 1/2" smaller on each side, so that the finished box will nest inside the first one. Again, this is different from origami boxes - the cardstock creates more thickness on the inside of the box, so the nesting box needs to be smaller. I decided to use the card message as the outside of the bottom box.


You could also use another card as the bottom, for design contrast. But for Pete's sake, make sure the colors don't clash! Oh, yeah, Christmas cards - a lot of green, red and gold. Never mind.

If you haven't thrown out your cards yet, this is an easy, inexpensive (like, free) way to decorate come next Christmas: attach a pretty ribbon to each box and hang them on the tree; string the boxes together to make a crazy colorful 3D garland; make an Advent calendar with 24 boxes and put a little treat inside each one (the average household receives 28 Christmas/holiday cards, that's more than enough!)

There's only three hundred and thirtysome days until next Christmas - better get folding!

Saturday, January 21, 2012

March of the Penguin

COLD! Minnesota in January is Arctic Cold - or should I say Antarctic Cold? Friday, Jan. 20 was Penguin Appreciation Day!!

Who doesn't like penguins? Okay, not Batman's nemesis The Penguin;  I'm talking about real-life, waddling, diving, swimming penguins. Add in Morgan Freeman's narration on March of the Penguins, it's no wonder that movie was so popular!


Speaking of Batman (and Morgan Freeman) - I spent the better part of two hours last night in an unheated cave, talking about mushrooms and dead gangsters. With accountants. A local accounting firm had their holiday party at the Wabasha Street Caves; and I was giving mini-cave tours to groups of 50-75 people throughout the evening. It was actually a lot of fun; most of them were nerdy enough to be interested in the history of the caves and St. Paul's gangster era, and just tipsy enough to appreciate some outrageous flirting with a tommy-gun wielding gangster moll. All in all, not a bad way to earn a living.
channeling my inner moll
And now - penguins! It was late when I started this project, but I knew what I wanted to do, so a quick gathering of supplies and I was ready. A sock doll is the perfect shape for a penguin; and since the snowman decoration was put away, Lois the cat was looking a little lonely in her corner. She needed a friend.


This time I used fiberfill to stuff a thick black sock, cut off the cuff, sewed it closed, and started adding some details.


Some orange fleece for a beak and web feet, the extra cuff fabric cut into wing shapes, and a snippet of the fluffy poodle/popcorn fabric from Thursday night. This gave my penguin a hairy-chested, manly look, which I like very much.


Pedro & Lois
Pedro the Penguin took shape very nicely, and joined Lois by the fireplace. Time of completion - 11:50 p.m.; booya! My son was confused by the Spanish name, until I pointed out to him that there are penguins in South America, as well as South Africa, Australia, and of course, Antarctica.

Stay cool!

POP!

I've heard it takes three weeks to really develop a habit; well, I'm at three weeks today, and rolling right along with my creations.

Thursday was Popcorn Day;  I don't know if every Jan. 19 is Popcorn Day, or if it's the third Thursday of January; but there it is, a day to celebrate popcorn. Which just made me want to go to a movie. But, the youngest needed to make something to bring to her Spanish class fiesta on Friday. She had to choose a recipe from a Spanish-speaking country, and do most of the prep work herself. No chips and salsa, no tacos; making the food was part of the project for the students. Yeah.

from "Taste of the Caribbean"
So, I got out some cookbooks, checked some online recipe sites, and she finally decided on Plantain & Sweet Potato Crisps. Full disclosure: the recipe comes from a Caribbean Islands cookbook, but plantains and sweet potatoes are both native to Mexico, I bought the cookbook in Puerto Morelos, on the Riviera Maya, and that's Spanish enough for me.

J. did really well with this project: she learned to peel plantains and sweet potatoes, kind of, and why it's important that the slices be a uniform thickness - for even frying. I handled the hot oil, deep-frying part of the recipe, put the chips in a paper bag and J. salted the chips with her own little shake-and-jump dance. This was J.'s project, not mine, so when we finished, I went back to planning a popcorn-themed creation.

it only looks like a poodle
I found a recipe for a caramel popcorn martini (made with liquid popcorn?!) and popcorn brittle, but I was done with cooking for the day. The youngest suggested a "plushy popcorn pillow toy", and I remembered a piece of off-white plushy fabric perfect for this.  I cut a modified square shape, gathered the cut edges with a running stitch, and started stuffing the pillow.


How to make the bumpy popcorn shape? I used a method called tufting, running a thread from the bottom of the pillow to the top, to cause the puckering. I made three tufts, to create the uneven puffy top. My daughter wanted me to add the lower part of the popcorn kernel as well, but I thought it might look too much like a tooth.  It's definitely a fine line between those two shapes.


I'm tempted to make more of these "popcorn pillows" and put them in a big popcorn tin. You know, one of those popcorn tins that people give at Christmas time, with three different popcorn flavors, and you never know what to do with the tin after the popcorn is gone. Or, maybe a tufted popcorn lid cover, and use the tin as storage for..... something. Or maybe I'll just get rid of the tin, and actually make a poodle out of the rest of the fabric. Or a costume piece, maybe a fluffy hat or muff. Or.... we'll see.

Thursday, January 19, 2012

Showing my bias

I really love soup.   I mean, really love soup.

And the combination of a head cold and a cold-weather snap give me the perfect reason to indulge this love.  I had two bowls of my remedy soup Wednesday for lunch ; I wasn't planning on the second bowl, but my oldest called me from the school nurse's office, because she was also sick and achy, so I needed that second bowlful, just for the energy to make the round trip to get her.   But I was able to get some cleaning and organizing done around the house afterwards; it was just the boost I needed to start functioning again.   

the old wooden drawer
This included my project for the day: upcycling an old drawer into a handy-dandy bias tape storage system!  I've had this drawer sitting around for years; I think I got it from a friend's garage sale, it seemed so useful when I saw it, I just had to take it.  And when my stepmom gave me two (!) bags of bias tape, hem tape and rick rack packages back in December, it seemed like a perfect match.  The packages just fit the length of each cubby in the drawer, after the plastic hanging tabs were cut off.  All these packages of trim and bias tape somehow came from a store, to an individual, who then donated them to the school where my stepmom works.  She couldn't figure out a use at school for all of this trim, so she passed them along to me for my costume work.  Which was lovely (I always need bias tape, and the random trims will also get used), but then I had to figure out where to put all of these items, in some semblance of order.


I was able to sort by color and width, for the most part.  One row of cubbies holds all the quilt binding, sorted by color; the rick rack trim is grouped together in a few cubbies; but the majority is bias tape, divided by narrow single-fold, wide single-fold, double-fold, and wide double-fold.  Bet you didn't know there was that much variety in the bias tape biz!  I think Tim Gunn approves.

 
"Make it work!"
And then I made potato soup for supper for the whole family, with crumbled bacon and chopped green onion added in.  Everybody wins!


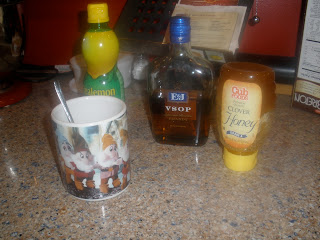
Hot toddy & the 7 Dwarfs

I almost forgot about my Tuesday creation.   By which I mean, I almost forgot to post it.  The head cold fog that I'm in is wreaking havoc with my schedule; I keep forgetting what day it is.

yes, those are the 7 Dwarfs
Anyway, after three days of theater work, on three different plays, I needed to keep it simple, see?  Also, I needed something I could work on while medicating with a hot toddy.


I got home from my Shakespeare rehearsal, mixed a medicinal toddy, dug around in my craft supplies, and found.....wooden beads.  In a variety of shapes and sizes, that seemed to just scream "bead doll" at me (maybe it was the drink, or the Dwarfs that were screaming, who knows?).  Even though I really wanted to make something with an owl, I just didn't have the brain power to come up with a concept.  Maybe next week.


I used black wire to string the beads together, which took a little effort with the large body bead; it didn't have as wide an opening as the other beads, but I was eventually successful.  Once the doll was complete, she just seemed female to me, so I added a little purple yarn for hair.


Finding a place to display her was another challenge; she doesn't stand up on her own.  There is extra wire at the top of her head, but I didn't want to hang her, that just looked... wrong.  She's actually rigged to the plate hanger wire, balanced in place on a shelf with some other tchotckes.  She doesn't seem to mind.

Wednesday, January 18, 2012

Soup du Jour

It's hard to create when your nose is drippy.  Feeling like your head is stuffed with cotton, grabbing a Kleenex every 5 minutes, constantly washing your hands - these are the real creativity killers. 

The symptoms crept up on me Monday, slowly wending their way into my consciousness, leading to the dawning realization around 3 p.m., "I have a head cold".  There was no denying it, no more ignoring the runny nose, the scratchy throat, the itchy eyes; all I could do was go with it and start some OTC remedies.  Black elderberry dissolving tablets, to reduce symptoms; vegetable soup with garlic, gingerroot, curry, red pepper flakes and homemade turkey stock to soothe my head, heart and soul.

soup, glorious soup
I was consuming a large bowl of this beautiful elixir before it occurred to me that the soup was my creation for the day.  No photos, no recipe, just a bunch of goodness thrown into a pot and heated up for my consumption.  All I have is a photo of the final result.

I was still in the early stages of the head cold, not quite to the point of misery, on Monday evening when we had the first read-thru for my theater's next production, The Mousetrap.  As the actors started to bring the characters to life, I thought about how this is a different kind of creation.  It's temporary, and collaberative, and can't exist without an audience.  Theater is a transient creation, of another world that the audience experiences for 2 or so hours of an evening.  It's a creation of illusion, as the actors open the "fourth wall" and invite the audience into this world.  It's a collaberative creation, between the director, the actors and the designers, as we build this world during the rehearsal process. 

This sounded much more eloquent in my head, before the cold took over my brain completely.  That thought may be lost in the ether, but the sentiment remains.  In my previous (abandoned) blog, I also wrote about collaberation in theater; the disparate elements don't happen in a vacuum, everybody needs to be involved in the creative process to bring the whole to fruition.

No more ramblings for now, it's time to fight the germs. Stay well.

Monday, January 16, 2012

Of Mice and Man-boobs

Fifteen days down, 351 to go.  Fourteen creations, and a mini-shopping spree.

Three plays in process, 5 more in the planning (just through May!).  There will be more plays later in the year (I hope!), I just don't have anything booked or scheduled yet. 

Zipper tape flowers, for reals.
Saturday was my husband's 50th birthday.  To commemorate the day, I got the biggest cinnamon rolls in the Twin Cities for breakfast, plus a pecan roll for myself.  Except he had a breakfast meeting scheduled for 10 a.m., so the kids and I enjoyed our rolls, whilst he went elsewhere.  I had a cave tour at my part-time job, so I wasn't around for lunch.  But we all managed to be together for dinner.  We had a lovely, large meal at Chianti Grill, then waddled over to a big old bookstore to attempt to walk off some of the pasta and birthday cake.  Which is to say, I was in a food coma all evening.  Fortunately, I  finished the second fingerless mitt (from my previous post) Saturday afternoon, so I did create something.  And they're lovely.  I found the zipper flower pins in a bag of trims that my stepmom recently gave to me; I wanted to add my own touch to these lovely mitts.

My Sunday consisted of a board meeting for my theater company, as we prepare for our second production, Agatha Christie's The Mousetrap.  Then off to a stumble-through and production meeting for Slasher; during which darling husband and 2/3 of my offspring decided to text or call me within a 30-minute span.  All independently, unbeknownst to the others.  And all because the hubs forgot to get milk.  The one thing he needed to get at the grocery store - and he forgot.  Well, he's 50 now, and his memory is going to pot (along with his belly.  This man is not aging well.)  Which meant a quick stop at the store on my way home, to purchase said beverage.

Finally, home. I fixed myself a late supper (good thing I have veggie burgers in the freezer; made me feel better about Saturday's splurge), poured a glass of vino, and settled in to watch the Golden Globes.  And thought about a quick project to work on from the comfort of my couch.  Because of the Golden Globes, I passed on the second episode of  Downton Abbey on t.v. (I'll catch it today online!), but I still wanted something inspired by the gorgeous outfits seen on that show. 

I had a small amount of black velvet ribbon trim left on a spool; certainly not enough to trim anything, but the perfect amount for a choker.   The women of Downton Abbey wear beautiful chokers paired with long beaded necklaces for their fancy dinner parties.  Also on hand, a beaded/sequined applique, perfect with the ribbon, and a plain hook clasp.  This was an easy handsewing creation - I turned under the cut ends of the ribbon, sewed each clasp half on the two ends, then centered the applique and hand-stitched it in place.

I feel like quite the fancy lady with my alpaca-silk mitts and velvet-beadwork choker.  These may be the last items I create for myself for a bit; with so much costume work in the next few weeks, my creations will include the following items: a horror film-inspired mask for Slasher; man-boobs for The Complete Wrks of Wllm Shkspre, Abridged (yep, just like Shakespeare's day - men playing the women's roles); and perhaps some little gifts for the cast of The Mousetrap, inspired by the title.
Seriously, the book just happened to be there.